How to Make Envelopes

Make Your Own Envelopes
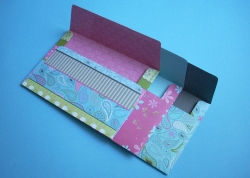
An envelope is only a folded up, glued piece of paper. That's it. If you can unfold an envelope (to use for a pattern), then you can make your own envelopes quite easily. But I'm taking it a step further by making really neat, interesting and one of a kind envelopes and giving them as gifts. This article is about how to make your own envelopes for yourself and for others.
I was satisfied with plain white envelopes for a very long time. But after realizing all of the possibilities with printed papers and envelope shapes the plain white envelopes just won't do.
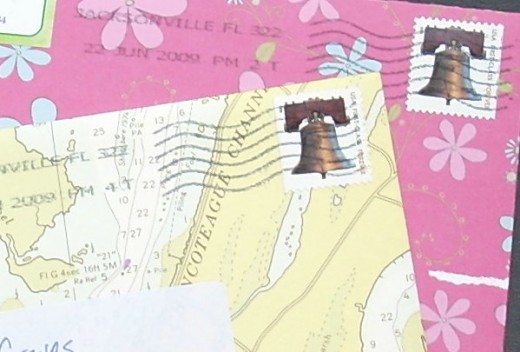
Can these envelopes be sent through the mail?
Yes, but remember 2 things...
1. You will have to add a white mailing label to the front of the envelope for the address. Patterned papers could cause a lot of mailing problems if you don't do this.
2. Check the size. According to the US Postal Service, envelopes can be no smaller than 5" wide by 3 1/2" tall to be sent through the mail.
If you'd like more information on Mailpiece Dimensions, here's a link to the US Postal Service: Mailpiece Dimensions
Envelope Making Materials
Simple stuff
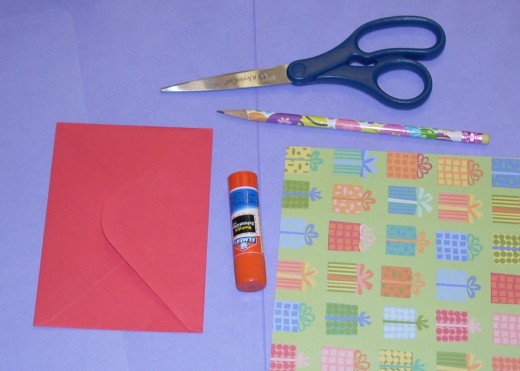
Materials:
Envelope (for making a pattern/template)
Paper (a lot more on this - scroll down)
Scissors
Pencil
Glue stick
Optional materials:
Cardboard
Ruler
Butter knife for scoring the paper
Choosing your envelope shape and size
This is important
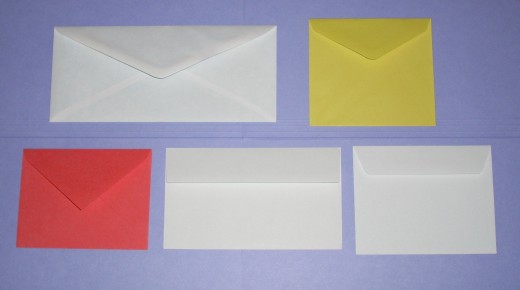
To the right you see some miscellaneous envelopes I keep in a craft drawer with my greeting cards. Look the different shapes of the flaps. Some are pointed and some are square. You can duplicate any envelope you want to, but some require larger paper than others. Envelopes with square flaps use less paper than pointed ones. This might not be an issue if you are making small envelopes, but larger ones will need larger paper.
The envelopes to the left are exactly the same finished size. You can see that there's a big difference in overall size between the two. Most of the paper I'll be working with (scrapbooking paper) comes in sizes up to 12" x 12" so I always choose envelopes that will fit on that size. I'm choosing the envelope on the left.
Think out of the box for paper sources!
There are lots of options
Any paper that can be folded and is large enough is fair game for envelope making. Here are some ideas:
Scrapbook paper
Old maps
Old magazines and catalogs
Wallpaper sample pages
Wrapping paper
Last year's calendar
1. Open up the envelope you've chosen along the glue lines
Once you choose the envelope you want to duplicate, carefully open it out flat. It's ok if it tears a little - they usually do. Do try to keep the edges of the envelope intact so you can trace it easily.
2. Check the size.
Now check the size of the envelope when it is opened up by laying it on top of your paper. The envelope I'm working with requires 12 x 12" paper and I'm satisfied with that size. If I didn't have paper large enough, I'd go back and pick a smaller envelope.
3. Trace the envelope onto cardstock.
This step is optional now that you have the envelope opened up. You can use the envelope itself as your template, but the paper is thin and hard to trace. I really like this envelope shape and size so I'm going to make a more durable template to use over and over again. It's important to trace the envelope accurately.
4. Cut out the template and label it.
Carefully cut out the template. Also, mark your fold lines with a ruler. This will help you visualize what paper patterns or images will end up on the front of the envelope.
There are also lots of free templates available online - Here's a list to investigate. Enjoy!
Just rememer that you'll be limited by the size of your printer paper. Most printers print only up to 8.5 x 14 (legal size). But come to think of it, you could always print out your envelope template and then take it to a copy store to enlarge it. Depends on how large you want the envelope to be.
- Cooknsee
No dimensions are given for this template. Print it at different percentages for the size you need. - Cute little envelope
When you click through, scroll down and you'll see where to click for the download underneath the envelope outline. This one reminds me of a seed packet envelope. - Petal shaped envelope
I can just see kiddo's making some of these for Valentine's Day! It's a simple fold-up envelope and a short message could be printed inside. *Note: I just used this template in Our Top 10 Ideas for Homemade Kid's Valentines. - Interlocking envelope template
Now this is really cool! An interlocking envelope. - Basic envelope template
Nothing fancy here, but makes a nice shaped envelope. - Announcement Envelopes
Square flap - size A2 & A6. Nice. - Another envelope template
This crafter made their own template. Makes full use of an 8.5x11 piece of paper
You can also purchase templates
If you'd rather buy templates, you've got some options. Take note that each of these products gives you one size template. Sizes are listed in the description. There are several more sizes at Amazon as well. Click through below and search Kreate-A-Lope.
1. Check the pattern on the paper.
Is the paper printed so there is a definite "up" and "down" (for example, words are printed on the paper and need to be right side up)? Or is it a random pattern where it will not matter? Make sure patterns are right-side-up on the FRONT of the envelope. I know about this because I just cut out an envelope where the pattern was upside down.
2. Trace the template onto your paper and cut it out.
Trace the template onto the BACK of the paper (so no stray pencil marks will show) and cut it out. When I purchased this paper, I didn't realize it was printed on both sides! So the inside of the envelope will be a nice interesting shade of blue. Set the template aside.
3. Score the folds and fold the flaps.
Scoring helps paper (especially heavy papers) fold in the right place. Using the back of a butter knife, score the fold lines and fold the flaps into position. If the paper you are working with folds easily you can skip the scoring.
4. Glue the flaps.
Look at the envelope you unfolded and take note of where it was glued. Make sure you glue the flaps only where the papers overlap. You don't want to glue the envelope shut!
5. Your envelope is complete.
Congratulations. Now that you are a pro, you can give these interesting envelopes as gifts or save them for your next mailing.
See what other crafters are doing... - More envelope ideas
- Envelope from an old calendar
Don't throw out that old calendar, make some envelopes with it. - Lots of envelopes
Made in all sizes from lots of papers. - Envelopes from magazines
Most of these envelopes appear to be made from magazine pages. - Beautiful envelopes from scrapbook paper
Scrapbook paper is this crafters preference. - Textured paper envelopes
Here's an idea from an Etsy crafter. These envelopes sold out! - Envelopes from maps and more
Scroll down past the food treats and check out the map and music themed envelopes.
How popular is envelope making?
Please participate in this poll
"Rings and other jewels are not gifts, but apologies for gifts. The only gift is a portion of thyself.''
Ralph Waldo Emerson
Not that I don't like a nice pair of earrings every now and then.
I hope this article (lens) has given you one more idea for your hip pocket for an inexpensive personal gift. Let me know you stopped by!


